


Hey All!
If you’re looking for a last minute gift that you can make yourself easily for a Valentine’s Day, look no further then our adorable Donut “Sprinkle Me With Love” Valentine’s Day Tote!
This amazing DIY/Craft comes to you in collaboration with the fabulous Monique of the amazing shop Antisparkle.com and the awesome blog sparklecollective.com. I was so excited when Monique reached out to collaborate. I was a huge fan of her designs and I visited her shop often as I love the Cupcake Thief character she created. Together we came up with this super cute idea.
To make this tote you need:
- An Iron
- Pillow Case
- Scissors
- Avery Fabric Transfer Paper
- A Tote Bag
- And our fabulous FREE template for the Donut Image and Matching Sprinkle Gift Tags.
To Download The Free Printable Donut Image and Matching Gift Tag Template CLICK HERE!

You start by laying a pillow case on a flat surface below your tote bag. You do this to protect your table and or surface that you’re putting your tote bag on as you are going to iron the tote on this surface. Heat the iron for 5 minutes at the highest temperature it can go.
You spend a few minutes ironing out any wrinkles in the tote bag.

You then print out your template and be sure you’re printing it with the white side down. You then cut the the donut and wording as close as you can with your scissors. You then center it on your tote bag or in the position you’d like it on the bag.

To get your donut image onto the tote bag you press your iron onto the transfer paper with two hands firmly. You’ll be placing a little bit of your body weight onto the iron so you can get the image to really stick on well. You then iron from left to right counting to 20. Stop and go back to the slow motion heavy slow ironing you started out with, then go back to the left and right ironing in which you count to 20. You do this for about 3 minutes and then you let the tote cool for 2-3 minutes. You can hold it in front of an air conditioner or fan for instant cooling if you don’t want to wait.
When it’s cold you peel off the paper and you have an adorable tote like this seen below!

How adorable is that! Too darn cute!
You then proceed to cut your matching gift tags. You then fold your tags in half and punch a little hole in the corner to pull a ribbon through. I used a heart hole punch as it’s Valentine’s Day and why not make the hole a heart!

Sign your tags with your sweet nothings or Valentine’s Day wishes and fold up the tote into a square.

Take some ribbon and sequins rope or how ever you’d like to decorate it and wrap it around your folded tote. Tie a bow and pull a ribbon from the bow through the hole in your gift tag.

And that’s it! Your done! You’ll have an adorable Valentine’s Day gift that I’m sure who ever gets it will love.
If you’re making it for yourself it goes perfectly with those sparkle glitter shoes and heart glasses you may have. Everyone has those right?

Stay tuned for more fun DIY’s from Antisparkle and The Queen of Swag!
Be sure to Visit Monique over at her amazing shop Antisparkle.com for more fabulous totes and tees!![]()
And also check out her blog Sparklecollective.
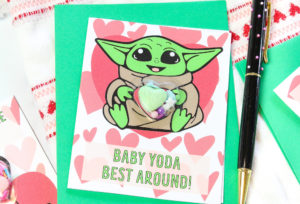
For more of our Valentine’s Day DIY’s, head over here!
![]()
All Photos taken by TheQueenofSwag.com. Please only use with permission.


Comments
SO CUTE!!!! My daughter would love this!
Cute idea! I’ve made several iron-on bags as gifts in the last few years and they’re always a hit!
such fun and creative project I love it
You are right! It is so darn cute!
Oh that’s adorable. I love the way you wrap it too.
Cute and perfect for so many recipients.
I sometimes have to scramble for last minute gifts. This Valentine’s Day Donut Tote is easy and perfect for one of those times that I might be scrambling to put something together.
SO cute! Very creative.
So original! This would be cute for my daughter to store some of her toys in since she has a sweet treat themed bedroom.
Very cute and I love how it is packaged.
That is the CUTEST! I would totally rock that myself, and I think I might make one for my niece!
How cute it this? I want to try something like that!
That is awesome and really looks like it came right from the store. Love it!
Very cute idea! Love how you packaged it too.