Hey All!
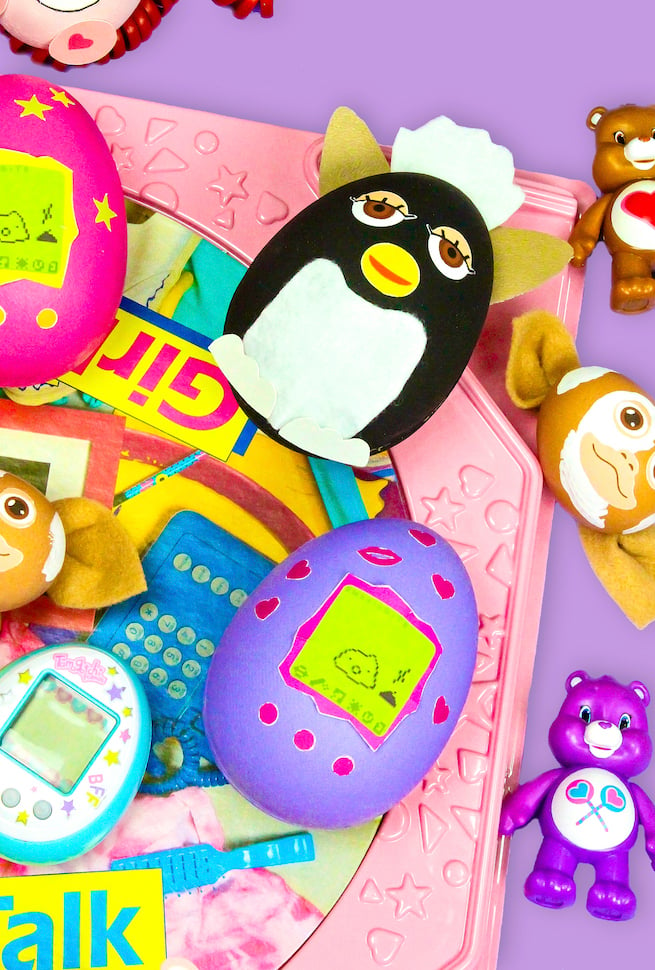
We’re continuing the throwback Easter Eggs with these super cute and easy to make DIY Furby Easter Eggs! I had a love hate relationship with my Furby growing up, but now I just love me some Furby’s because they remind me of those carefree younger years. Oh how I wish we could turn back time! I can’t do that, so I’ll bring back those times with my Easter Eggs. Here is how to make them!
I love how these came out by the way!
- A Piece of Beige Leather For The Ears.
- White Sticker Backed Felt
- Scissor
- Glue Dots
- Black Craft Paint
- Paint Brush
- I used these Paper Maché surprise eggs, but you can use any eggs you’d like to use.
- Printable Vinyl
- And this Free Printable Download of the Furby Pieces.
First you download this Free Printable Download of the Furby Pieces. You then print that onto your printable vinyl.
You then cut out two about two inch curved triangular ear shapes from the beige leather piece. You also cut out a zig zag piece of white felt for the top of his hair and a rectangular piece for his belly. I used my awesome Twerkstorian patch as a reference since my Furby is full white!
You then use either your scissors or a craft cutting machine to cute out the eyes, mouth, and feet from the printed vinyl. Once all your pieces are cut, you then paint your eggs black. Paint as many eggs as you’d like to make.
Once the eggs are completely dry after a few hours, stick on your eyes and mouth. You then stick on his eyes, mouth, and belly fur. You then stick on his feet. You stick the sticky part of the white felt to the inside of the back of the egg along with the ears using some glue dots.
When you press the egg together, it will hold the ears and hair in place secure.
That’s it! You’re done and you’ve made yourself some super cute Furby eggs!
You can see a preview of what’s to come with our other DIY Throwback Easter Eggs series! I hope you love them as much as I do! I’m having a ball with these!
Stay tuned for more fun throwbacks to my favorite childhood toys as Easter Eggs coming at you soon!
You can find more fun Easter DIY’s and Recipes HERE!





















Comments