This post is sponsored by Darice. All Opinions are my own!

Hey All!
Let the holiday fun begin! We’re in full holiday DIY mode here on-the-blog and I’m so excited to kick off our holiday content with you today. I like to call it the Holi-DIY season! The holidays are my favorite time of year to get crafy and nothing is more trendier this holiday season than those wooden holiday sign decorations. I’m seeing them everywhere! I’ve seen them on fire place mantles, tiered trays, kitchens and more! As soon as I saw them, I immediately thought this trend would be a fun DIY project to do. It’s so fun to personalize, as you can’t always find fun phrases on those signs. They are usually generic holiday phrases. With these DIY Darice Crafts Holiday Wooden Signs, you can make any fun phrase you’d like on a sign! I love how mine came out and I used all products Darice products to make them! I’m thrilled to be working with my most favorite craft supplies company Darice and their fabulous online crafts shop ConsumerCrafts.com to bring you this super easy to make and fun holiday DIY! All of the products used to make these were found on ConsumerCrafts.com! They have the best deals and bargains for craft supplies on the net!
I’m not just saying that! They always have amazing sales! By shopping on their site these two signs only cost about $25 to make, which is the price of what one of these sometimes costs if you bought it already made in stores. I am particularly obsessed with how the “Let it Snow” sign came out! I know it’s a generic phrase, but I can never find a sign with snowmen and that has fun colors like this. I’m so happy with how it turned out!
It’s the cutest! I also love the “Baking Spirits Brite” sign, as I had to spell Brite like I spell it here on the site. I spell it like Rainbow Brite. You can never find a sign with brite spelled this way. You also can’t really find signs with fun boarders like this. I have the baking one in my kitchen and it’s the perfect holiday decoration!
Here is how to make them both!
- One Unfinished Wood Shadowbox: 8.5 x 11 x 1.75 inches and One Unfinished Wood Shadowbox: 12 x 12 x 1.75 inches
- Two Darice® Chipboard Letters: 2 inches, 39 pack.
- One Felties® Gingerbread Stickers: 1.75 x 2.5 inches, 22 pack
- One Wood Gingerbread Shapes: 3 pieces
- Foamies® Group Activity Kit – Snowman – Makes 6 snowmen.
- Two Darice® Felt Alphabet Letter Stickers – Bright Colors – 2 inches – 79 pack
- One Darice® Matte Acrylic Paint: Turquoise, 2 ounces
- One Darice® Matte Acrylic Paint: Holiday Red, 2 ounces
- One Darice® Matte Acrylic Paint: White, 2 ounces
- Brown or Black Marker
- Paint Brushes
- Painters Tape
- Darice Smooth White Cardstock
- Darice Glue Stick
- Glue Gun
- Scissors
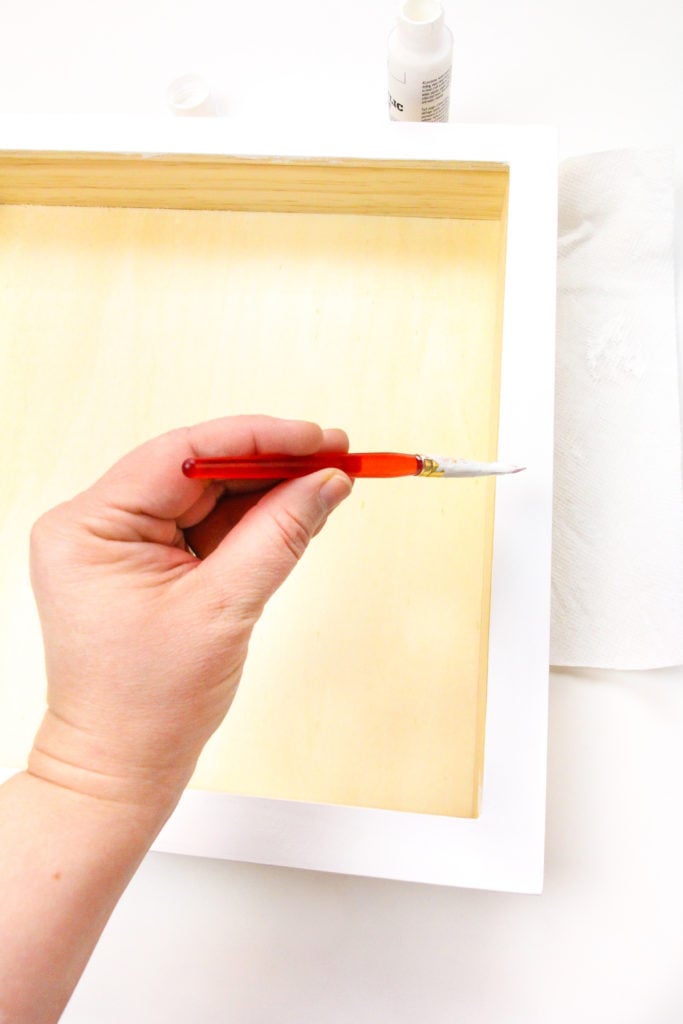
Let start with the “Let It Snow” sign. It’s the smaller 8.5 x 11 sign. You simply paint the entire wooden frame Turquoise with your Darice® Matte Acrylic Paint.
You let paint dry completely and then use your glue stick to stick a piece of white cardstock inside the center of the frame.
After that you stick the letters inside. They are peel and stick letters, so no worries about having to glue them. The little snowman kit you’ll use to make the snowmen came with some snow and snowflake stickers. I put the snow on some of the letters and the snowflakes around the letters.
I then proceeded to make the little snowmen.
The kit comes with everything you need to make the little snowmen. I wanted to jazz mine up a bit, so I made one with a pink hat.
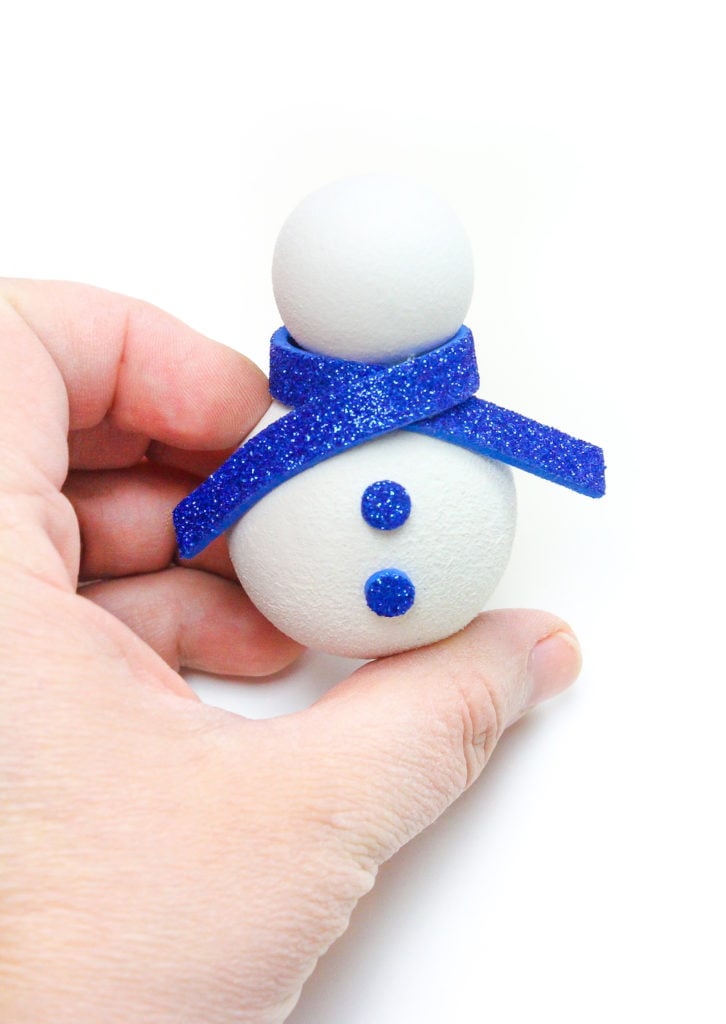
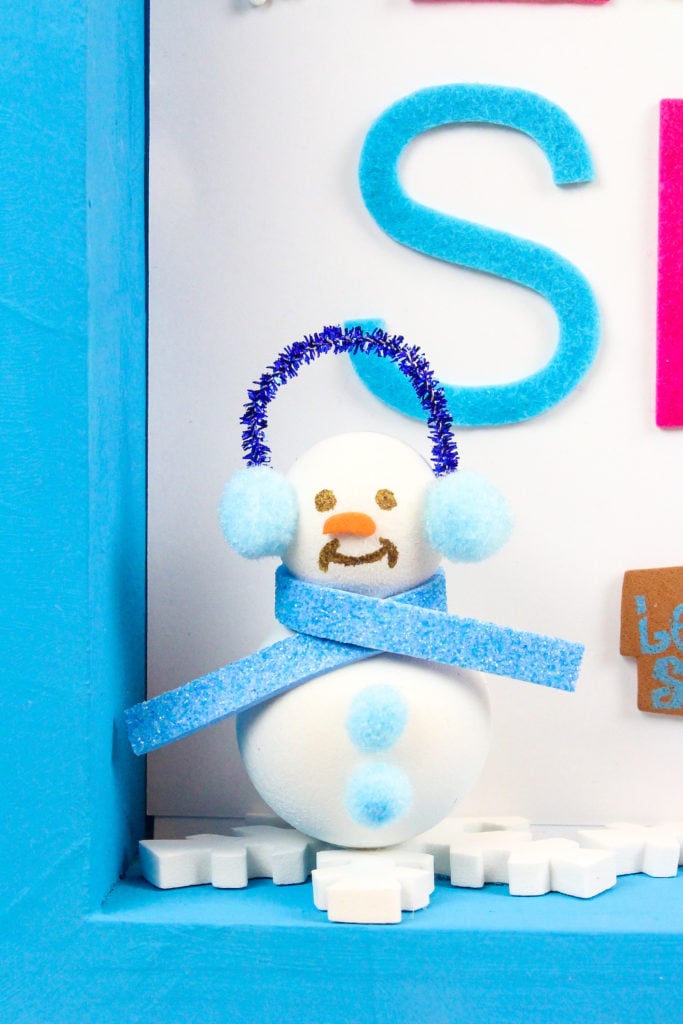
You simply hot glue the large and medium sized little styrofoam balls together to make your snowman. You then glue on the scarves and either stick on some sticker buttons or glue on some pom pom buttons. You can make little ear muffs with the pom poms for your snowman or leave him with out a hat or ear muffs.
I actually made this hat using a left over “O” stick on letter. The inside of the “O” has a little circle you have to pop out of the O before you stick it. I used that little pink piece to make a little pink hat for one of the snowmen.
You draw on some eyes and mouths with your markers and you’re done making your snowmen.
I then cut the styrofoam snowflakes in half that came with the snowman craft kit and glued them to the bottom of the frame.
I then glued on the little snowmen and the “Let it Snow” signs!
I love that the sign says “Let It Snow” three times, just like the song! I sing it every time I see it.
That’s all you have to do to make that adorable colorful holiday sign. Super simple right?
Now to make the candy cane boarder “Baking Spirits Brite” sign…
You’ll be using the 12×12 inch wooden frame for this one. First you paint the body and the front of the frame white. This is the base white for your peppermint like pattern. You let the white paint dry completely.
Once it’s dry, place strips of painters tape along the frame border and paint the red stripes and inside of the wooden frame red. The Darice® Matte Acrylic Paint I used is actually called Holiday Red and I love it! Let the red paint dry completely. These paints dry pretty quickly, so it really doesn’t take that long to do. Pull the tape off and you have your candy cane stripes. You can use some white or red paint to clean up any of the stripes that may have leaked under the painters tape.
Next you take out the chipboard letters you need to spell out the phrase and paint them white.
Once the paint on the letters and frame is dry, stick them into the inside of your frame with your hot glue.
You’ll also stick on your wooden gingerbread pieces…
And these cute little foamies sticker gingerbread boys and girls.
You’ll place one on each side of the word “Brite” and you’re done!
How cute are these signs folks? So cute!
I’m so happy with how they came out and i’ll be sure to use these for many holidays to come! They are the type of DIY craft decor that you can use over and over if you take care of it each holiday season.
I hope you love these cute and easy to make DIY Darice Crafts Holiday Wooden Signs just as much as I do!
Be sure to check out ConsumerCrafts.com for all the supplies to make these and more! They will surely have everything you need to get your holiday craft on!
Thanks so much again to Darice for sponsoring this post. All Opinions are my own!
And thank you for supporting amazing brands like this one that help keep this site going!
You can find more DIY Ideas for the holidays on the CosumerCrafts.com blog too!

















Comments
This is completely adorable! I really love Darice because they have the best prices for crafts and wholesale.
This is just so cute! I’d love to put one of these up for Christmas. The little snowmen are the best!
These are adorable. Yay, new project!
This is such a cute idea. I really love this. I’m going to have to make some of them now. I’d love to have them for around my home.
This would be so fun to make. I need to make this with my boys for our decorations
Both of these signs are simply adorable. They would be fun to make with the kids.
How adorable are these wooden signs! My kids will love them!
Such cute and simple projects! I think I can get my kids help with them too. I love using Darice products.
This is really cute. I am sure my older kids would like to make a project like this. They would feel so accomplished.
Those are super cute and easy to make, I need to start crafting soon with my son
This is just so cute! I’d love to have them for Christmas to brighten up our house!
This is such a cute and fun holiday craft! Love how festive and colorful it is